Showing posts with label recipes. Show all posts

Wednesday, July 6, 2011

Back in the Saddle - with a new recipe to share!

Well, I've given up.

I've given up on my China Journal. I've decided that I never actually intended to finish writing and posting about our adventures in China - so if you're curious about the last half of our trip, just ask! Otherwise, I think it's time that we all move on.

I may be alone in this, but I have been seriously missing my usual creative outlets that I share with you on this Blog. I haven't really been trying many new recipes, and I haven't pulled out the ole' sewing machine since we left for China! That changes today!

I know I'm way behind on my CSA posts (on account of being out of town, laziness, etc), but I thought I'd pick right back up with week 8 followed by a recipe using some of those tasty ingredients.

Here is what we got in the bag this past week:


A delish assortment of nectarines, squash, onions, tomatoes, blueberries, homemade bread, and eggplants {check out the teeny-tiny heirloom varieties! What do you do with those guys?}

I love the food this time of year! Yummy fresh produce + cooking on the grill = one happy lady! One of our go to sides at this time of year is a Caprese salad. Sooo tasty with fresh mozzarella and ripe heirloom tomatoes. All you need is a high-quality olive oil and some salt and freshly ground black pepper. Perfection.


Remember that recipe I promised you? The one that uses fresh local produce? Well here it is!
This is courtesy of Jill Forrester @ Whitton Farms (where we get our CSA).

Blueberry Zucchini Bread

Ingredients
3 eggs, lightly beaten
1 cup vegetable oil
3 teaspoons vanilla extract
2 1/4 cups white sugar
2 cups shredded zucchini
3 cups all-purpose flour
1 teaspoon salt
1 teaspoon baking powder
1/4 teaspoon baking soda
1 tablespoon ground cinnamon
1 pint fresh blueberries

Directions

Preheat oven to 350 degrees F (175 degrees C). Lightly grease 4 mini-loaf pans.
In a large bowl, beat together the eggs, oil, vanilla, and sugar. Fold in the zucchini. Beat in the flour, salt, baking powder, baking soda, and cinnamon. Gently fold in the blueberries. Transfer to the prepared mini-loaf pans.
Bake 50 minutes in the preheated oven, or until a knife inserted in the center of a loaf comes out clean. Cool 20 minutes in pans, then turn out onto wire racks to cool completely.

This past weekend we made the trip back to Alabama to vist my folks and for Mr. Maestro to do this:


Yes, they are standing in the street.

In the meantime, I'm working on a new project! YAY! I'm not saying what it is, but here is a little tease:

Tuesday, May 17, 2011

CSA - Week 2

As some of you may know, Blogger was down for a few days last week. That, my friends, is my excuse for the frightfully long delay in my posting. Yep. And I'm sticking to it!

So, as my previous post mentioned, our CSA has just recently kicked back into gear. Mr. Maestro and I have renewed our dedication to consuming 100% of our share each week - and so far {after one week} we're doing a great job! Wanna know what I ended up making last week?

Ok, you twisted my arm...

As excited as I was about the Sorrel Pesto, I had a last minute change in my game plan and decided to make this instead:


Sorrel Soup! Want the recipe? Click here
The soup was delicious, although Mr. Maestro and I decided that it would be great as an appetizer - perhaps served as a "shooter" in a shot glass. The taste was lemony and bright...or as I described it: "Green." Definitely worth a try, however, perhaps not the best consumed in large quantities.  I used some of our spring onions in place of the shallots.

We served it with some delicious savory roasted sweet potatoes and spring onions {tossed in olive oil and seasoned with a little salt, pepper, and some garlic powder prior to roasting} and a delicious chicken quarter. Hello, Chicken Quarter! Where have you been all of my {married/cooking} life! You are so CHEAP, and oh so tasty! I rubbed these bad boys down with a bit more oo {olive oil - extra virgin if you must know-  I am refusing to use RR's famous "EVOO" tag-line!}, and then sprinkled with a bit of salt, pepper, garlic powder, dried parsley, and some chopped fresh rosemary. They do still have skin {remove prior to eating to reduce Calories and fat}, but I rubbed the spice mixture up under the skin to be sure the meat was flavorful. I cooked @ 350 for about 40 minutes {or until the internal temp reaches 180}.  FEAST!

 And for dessert? Angel food cake with some of those yummy fresh strawberries!

I used the salad greens to make a couple of killer salads - and we enjoyed the fresh baked bread with a few different dinner meals. That wraps up week one of our CSA!

Now, on to week two!

I'd show you what came in our bag, but I seem to have deleted the photo! Oopsies!

I'll tell you instead.

We got more spring onions, more salad greens, more sweet potatoes, some radishes, some fresh rosemary, and a loaf of fresh homemade whole wheat bread!

We love radishes cut up and served with hummus. Want a great hummus recipe? Ok!
Try this one: 5 Minute Hummus

We have baked a few of the sweet potatoes and served with cinnamon {yum!} but we've roasted most of the so far.

The salad greens have made us some more great salads, and the onions have been used both cooked and raw.

I love the aromatic nature of rosemary and I've used it this week to season both meat and vegetables!

I still have a few ingredients yet to use before we pick up week 3 on Thursday!  Can't wait to see what's inside!

Saturday, February 12, 2011

Decadent Valentine's Day Dessert

This year, Mr. Maestro and I decided to stay in for V-day (and celebrate a couple days early) and cook a special meal together. We had a delicious meal, but the best part was dessert. DISCLAIMER - this is not a dietitian approved recipe.

Chocolate Molten Lava Cakes

6 Tbsp butter
3 squares semi-sweet chocolate (cut into pieces)
1/2 cup sugar
6 Tbsp all purpose flour
Pinch salt
2 large eggs
2 egg yolks
1/4 tsp vanilla extract
Powdered sugar

Preheat oven to 425 degrees. Coat the inside of 4 ramekins with butter and then sprinkle with sugar.

Microwave butter and chocolate pieces on high for 45 seconds. Stir with whisk until smooth. Add in sugar, and flour - continue to whisk until blended. Next, beat in eggs, egg yolks and vanilla. Evenly spoon into the four prepared ramekins. Refrigerate 1 hour or until ready to bake.

Bake for 13 minutes or until the edges are firm and the middle is still slightly soft. Be careful not to over bake. Cool on wire rack for 5 minutes. Loosen edges with knife and then unmold onto individual serving plates. Dust with powdered sugar.

This is yummy by itself or served with strawberries or raspberries. Mmmmmmm....delish!

Tuesday, February 8, 2011

Quick and Tasty 4 Ingredient Dinner

Tuesday nights are busy at our house. My typical schedule includes going straight from work to the University - where I teach a nutrition course. By the time I get home, Mr. Maestro and I are both STARVING! Unfortunately, if I don't already know what we'll be having for dinner by the time I go to class, I typically remain uninspired - and we end up ordering take-out.  Tonight, I have a plan!

My plan involves using up some more of the gazillion new potatoes I have left over from last years CSA {If you aren't involved in Community Supported Agriculture in your area, I recommend you check it out! Our CSA is from Whitton Farms}. In addition to the potatoes, I'll be using three ingredients I try to always keep on hand: Frozen Tilapia {it is a mild fish that thaws and cooks quickly}, fresh lemon {great to have hanging around to add zing to fish and chicken, to combine with olive oil and red wine vinegar for a delish salad dressing, or for any number of household uses}, and Kalamata olives.

Like the Southwestern Chicken Soup, my recipe inspiration is again from Real Simple.

Roasted Tilapia, Potatoes, and Lemon

What you'll need:

  • One pound of new potatoes, halved or quartered {quarters will cook faster}
  • 1 lemon, sliced thinly
  • 1/4 to 1/2 tsp dried thyme {or 8 sprigs fresh thyme} 
  • 2 Tbsp + 1 tsp olive oil 
  • Salt and Pepper {I prefer to use sea salt  or kosher salt and freshly ground black pepper }
  • 1/2 cup kalamata olives, pitted {here's  how to pit an olive}
  • 4 6oz skinless tilapia fillets {thawed, if frozen}
  • 1/2 teaspoon paprika
Here's how:

  1. Heat oven to 400° F.
  2. On a large rimmed baking sheet, toss the potatoes, lemon, thyme, 2 tablespoons oil, and ¼ teaspoon each salt and pepper. Arrange in a single layer.
  3. Roast, tossing once, until the potatoes begin to soften, about 15-20 minutes.
  4. Toss the olives with the potato mixture; nestle the fish in it. Drizzle the fish with the remaining oil and season with paprika and ¼ teaspoon each salt and pepper.
  5. Continue to roast until the potatoes are golden brown and crisp and the fish is opaque throughout, 12 to 15 minutes.
To balace out the meal, serve with a small green salad.  Tasty!

Roasted Tilapia, Potatoes, and Lemons

My fish is already thawing in the refrigerator and Mr. Maestro will prep the potatoes when he gets home from work so they can start roasting. When I get home from class, we'll just throw the remaining ingredients together and pop them in the oven for the final 15 minutes.  What are your favorite quick and easy meals?

Sunday, February 6, 2011

Need a last minute Appetizer?

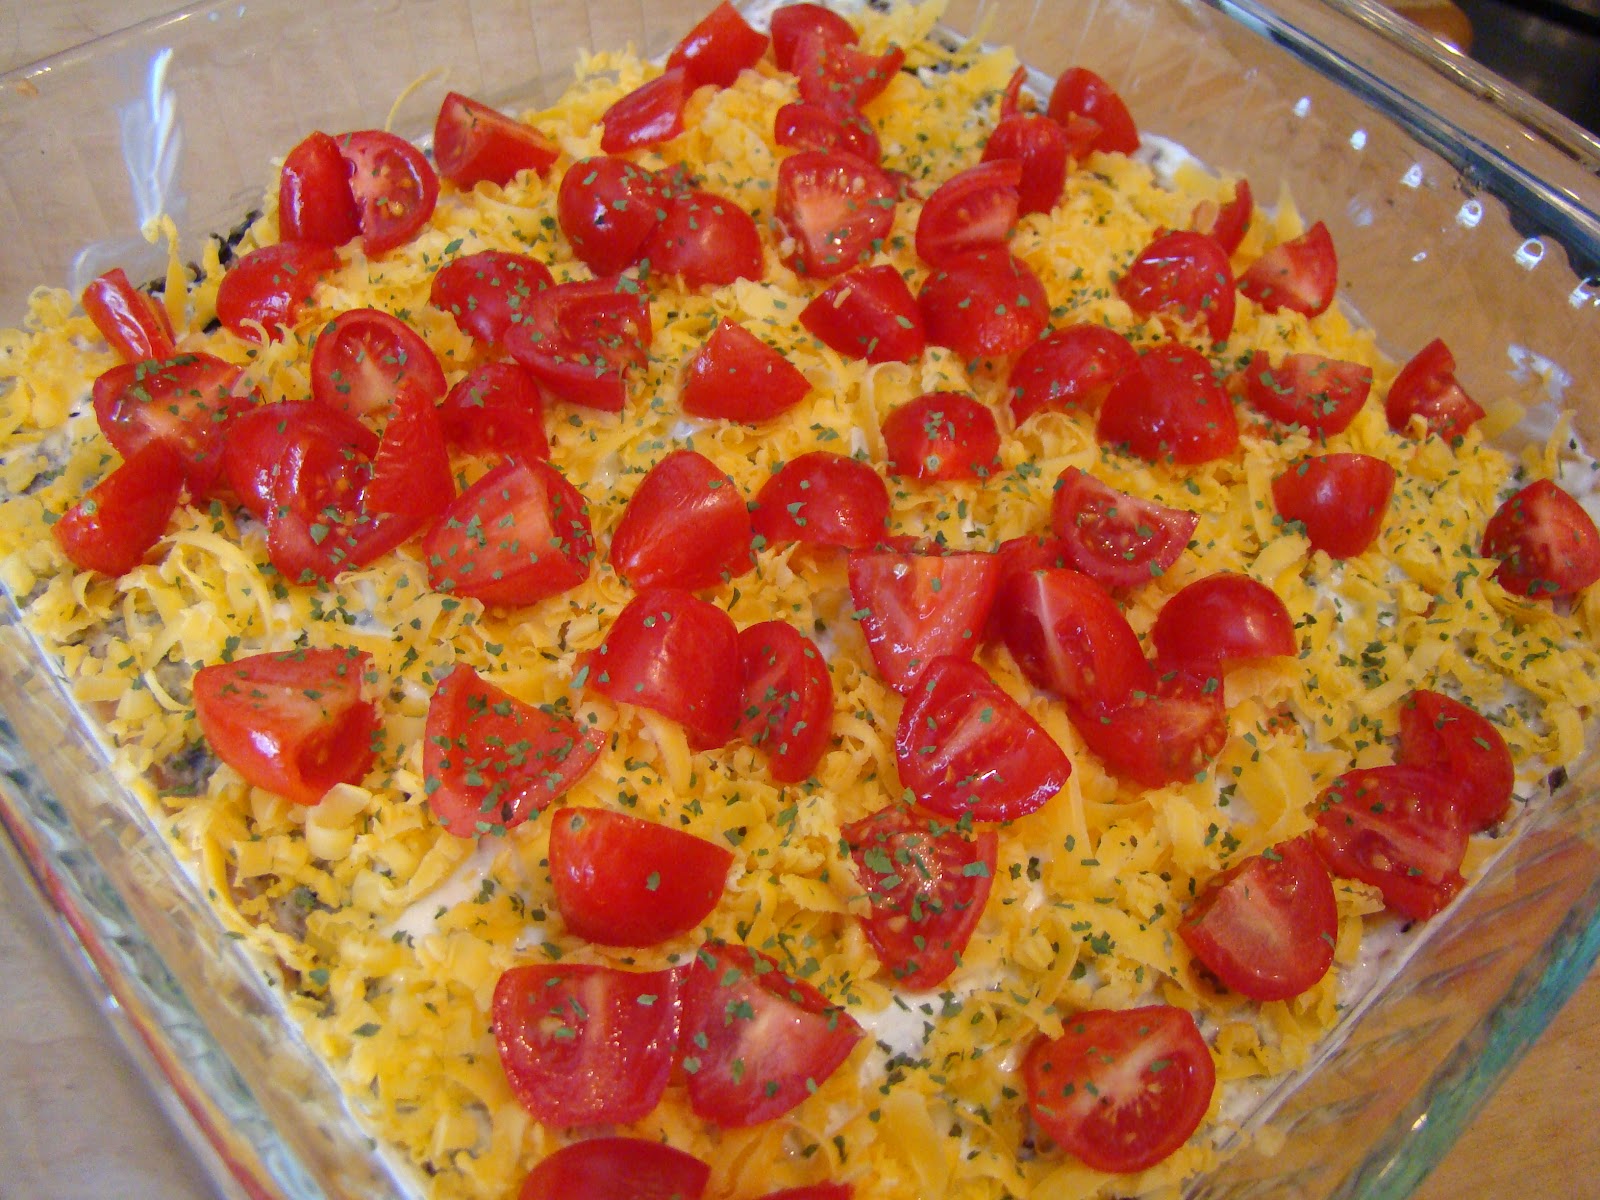
If you are like me, you may have plans to gather with friends tonight to watch the Super Bowl.  If you haven't thought about what to bring until now, you're in luck! You still have plenty of time to whip something up that tastes great and only requires a few ingredients. You can make this dip ahead of time and refrigerate it, or make it right before the party starts.  Yum!

Mexican Layer Dip:

1 can refried beans {fat free - no need for the added lard in the original recipe}
1 tsp cumin
generous 1/3 cup sour cream
chopped or diced olives {optional}
salsa {or individual ingredients such as chopped chilies, tomatoes, cilantro, etc}
cheese {you can use shredded cheddar, colby-jack, or Mexican blend}


Mix the can of beans with the 1 tsp cumin. If you don't have cumin on hand, you could use taco seasoning as well.


Next, spread the beans into your serving dish. I typically use a tart or pie plate, but both have mysteriously broken or disappeared in the past 6 months and I have yet to replace them. I'm using a 9x9 Pyrex serving dish.


Now, add your olives. Spread evenly over the bean and cumin mixture.


Now, add your salsa -or if you are like me, you can add some of the salsa-esque individual ingredients. 
I am adding green chilies here.


Remember to spread each ingredient evenly over the whole surface of the dip. You want each bite to taste consistent with the next.  Now add the sour cream.


Once that is spread on top, add your pre-grated cheese {or grate the cheese on top}. Just add enough to cover the top. 


Next top with tomatoes {this step is optional if you added salsa under the sour cream layer}. If you have fresh cilantro on hand, it will look nice sprinkled on top. I didn't - so I used a bit of dried cilantro.


That's it! 

Pop it in the refrigerator until time to eat. I'm serving mine with Frito's Scoops {I like that they are made with only three ingredients: corn, corn oil, and salt. This doesn't make them "healthy" - but choosing foods made with fewer REAL ingredients does tend to be healthier for our bodies then pumping them full of unpronounceable preservatives.}


I know I've been a bit recipe heavy this week, but I've got several projects in the works. Stay tuned next week for a DIY throw pillow tutorial as some simple DIY gift ideas. 

Happy Sunday!


Saturday, February 5, 2011

To Broth or Not to Broth - there is NO question!

Broth, of course!

If you've never made your own chicken, vegetable or beef broth before, I'd encourage you to give it a try! Sure, every now and then I find myself picking up a box or two of broth to have on hand {if I buy it, I prefer to buy the organic low sodium broths}, but if I have a choice, I will ALWAYS choose to use home made broths for cooking. They add a wonderful depth of flavor, are lower in sodium {my fingers swell just thinking about store-bought broth!}, are money savers, and are really very easy to make. The only trick is remembering to make it when you have the appropriate items on hand and to remember the three "Rules of Broth".

Here are the rules:
1. Start with COLD water
2. Don't stir the broth!
3. Don't let the broth boil

And here are the basic items:
Chicken bones {rember that rotisserie chicken we used here? I use the whole carcass}
Enough cold water to cover the bones
That's it - those are the basics!

If you have these on hand, they are nice to add:
1 large white or yellow onion. I've used red too, but it can give a slight purple hue to the broth. It's totally fine, it just may look wierd.
2 medium carrots, cleaned and cut into 1 inch pieces
2 stalks celery, cleaned and cut into one inch pieces
2 cloves garlic, lightly crushed

If you are feeling adventurous -
Add any other veggies {yellow squash and zucchini are great} that are about to go bad in your fridge. You do NOT want to use starchy veggies like potatoes, corn, or beans - they will make the broth cloudy. Also, if you use things like tomatoes, expect a reddish orange colored broth. Don't use lettuces either, but cabbage would be fine.

If you are feeling fancy -
2 bay leaves
3 sprigs fresh thyme
1/2 tsp freshly ground black pepper
10 parsley stems, crushed
2 cloves garlic, lightly crushed

  • Once you have all your ingredients gathered, place the bones in a large stock pot {at least 8 quart} and cover with cold water.
  • Bring the water to just under a boil {a few bubbles is fine, just try to avoid a rolling boil} and then immediately turn the heat down to a simmer. You can stop here for the most basic broth. If you have the optional ingredients (veggies, herbs, etc), add them now.
  • Continue to let the stock simmer for at least 4 hours {I often let mine simmer overnight}. Remove from heat.
  • Strain the stock through a collander to remove the bones, and then again through a fine mesh strainer to remove any other particles.
  • Place the now strained broth in a sink full of ice water to rapidly reduce the temperature {to avoid prolonged time in the temperature danger zone} and then place in the refrigerator. I do this in the morning and then when I get home from work in the afternoon, I take it out of the fridge and remove the fat layer from the top {it will solidify with the cool temp and be easy to remove}.
  • Measure out 2 cup quantities and put into quart sized freezer bags. Place the bags flat in the freezer {if you have room to lay them on a cookie sheet in your freezer that is the easiest}. Once they are frozen solid, stack them on up!
To make beef broth, substitute beef bones for the chicken bones.
To make veggie broth, add more veggies and follow the same steps.

The longer you let the broth simmer, the more the flavor will develop.

It may seem like a lot at first, but really it's just a  few steps, spread out over several hours. There is no such thing as whipping up a batch of broth; but just because it isn't fast, doensn't mean it isn't easy!

Oh yeah, you can make this in a crock pot too!


Do any of you make broth? How do you do it?

Thursday, February 3, 2011

What's For Dinner?

Brrrr! It's cold outside! 
If you're like me, nothing says cold weather comfort like a nice steamy bowl of soup. On a day like this {with MORE expected snow tonight - what is up with this weather?!}, I thought it would be timely to share with you, dear reader, one of my favorite {and healthy!} soup recipes.  The best part about this recipe? Besides the fact that it's mouth-watering good, it's also SUPER easy, and DELIGHTFULLY quick!  Rotisserie chicken and cannellini beans {white kidney beans}make this a protein rich and fiber packed soup, and the added avocado chunks add some heart healthy fats. YUM! 
 I can't claim ownership of this recipe (just some modifications). 
You can find the original recipe here: Southwestern Chicken Soup

Here's what you need:

  • 2 cans Cannellini Beans {rinsed and drained}
  • {bonus tip, did you know that rinsing off your canned beans removes over 1/3 of the sodium! Yippee!}
  • 1 12-16 oz jar Salsa Verde {the more authentic the brand, the better the taste!}
  • 1 rotisserie chicken, shredded {skin removed, of course. Save the bones for broth!}
  • 3-4 cups low sodium chicken broth {home made is the best. Don't know how? I'll teach you!}
  • 1-2 tsp cumin


  • Chopped cilantro, avocado, and a dollop of sour cream to garnish. Tortilla chips.


Pour the salsa into a deep saucepan or stockpot. Stir while cooking over medium heat for 2-3 minutes.
Next add the broth, chicken, cumin, and beans. Stir to combine. Bring to a boil, and then lower heat to simmer for 10 minutes.

Divide into bowls (makes 6-8 servings) and top with dollop of sour cream, chopped avocado, and cilantro. Serve with tortilla chips. Mmmmm Mmmmm Good!